
General information
The window Plan in the module Plan offers tools for creating and setting up plans. Each plan is configured with projects, data sets, models, price lists, and regimes. Also, overhead costs and capital expenditures can be allocated to each plan. Finally, the user needs to define the objective of each plan which can be either maintaining the specified administrative regime, or maximising net present value. The by selecting maximise net present value allows the use Iptim's optimising power to its full potential.
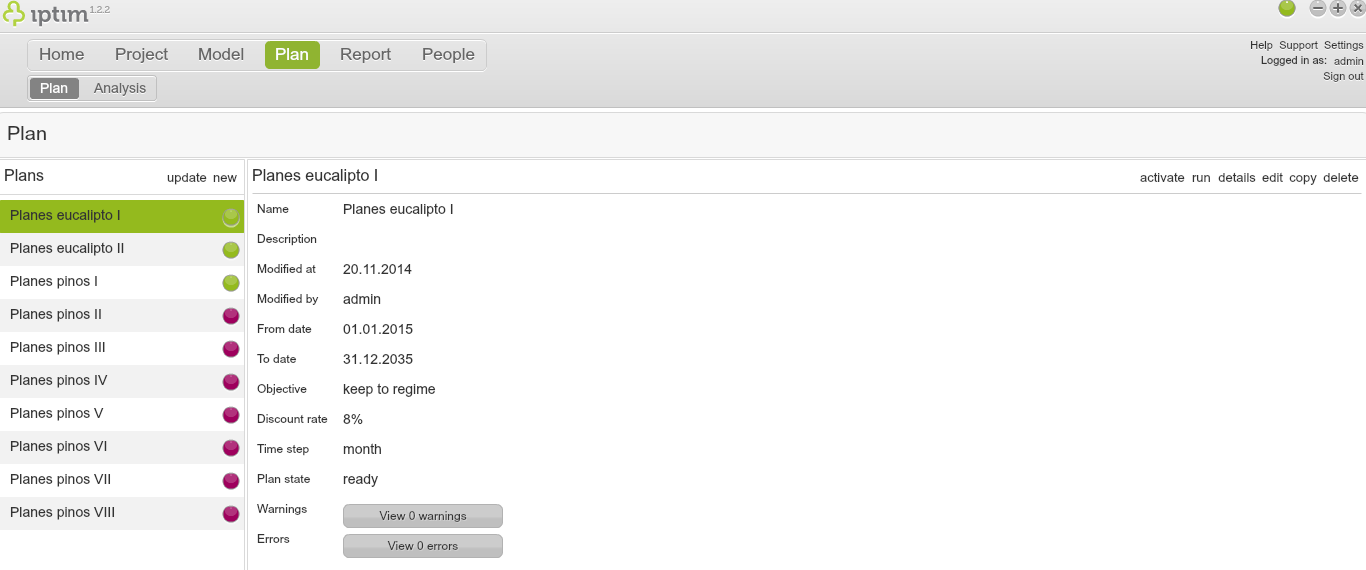
Plan window main view.
__
- Click on the window Plan in the module Plan.
- Click on new in the section Plans on the left side of your screen.
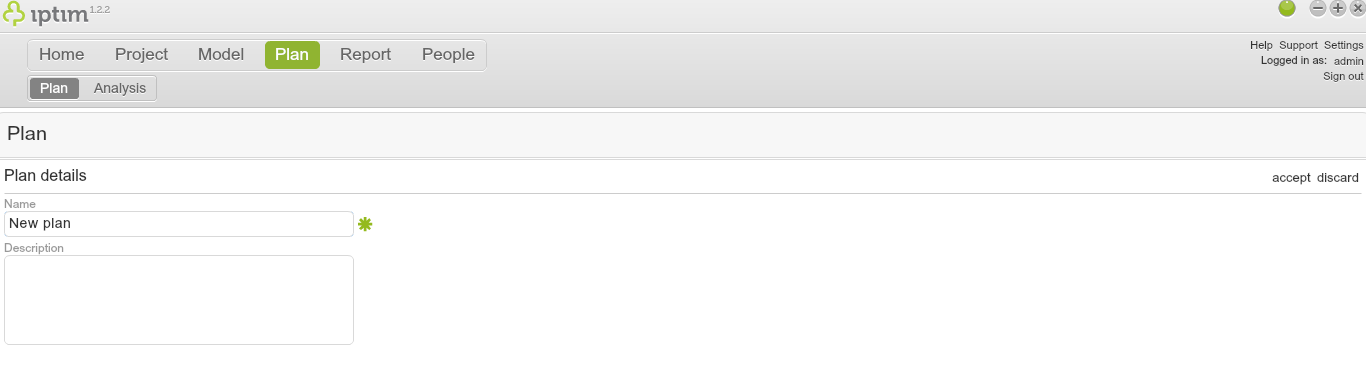
- Enter a Name and Description for your new plan.
- Click on accept.
- Click on the window Plan in the module Plan.
- Select a plan to edit in the section Plans on the left side of your screen.
- Click on edit on the right hand of your screen (or double-click on the plan that you wish to edit).
- Click on the window Plan in the module Plan.
- Edit a plan (see above).
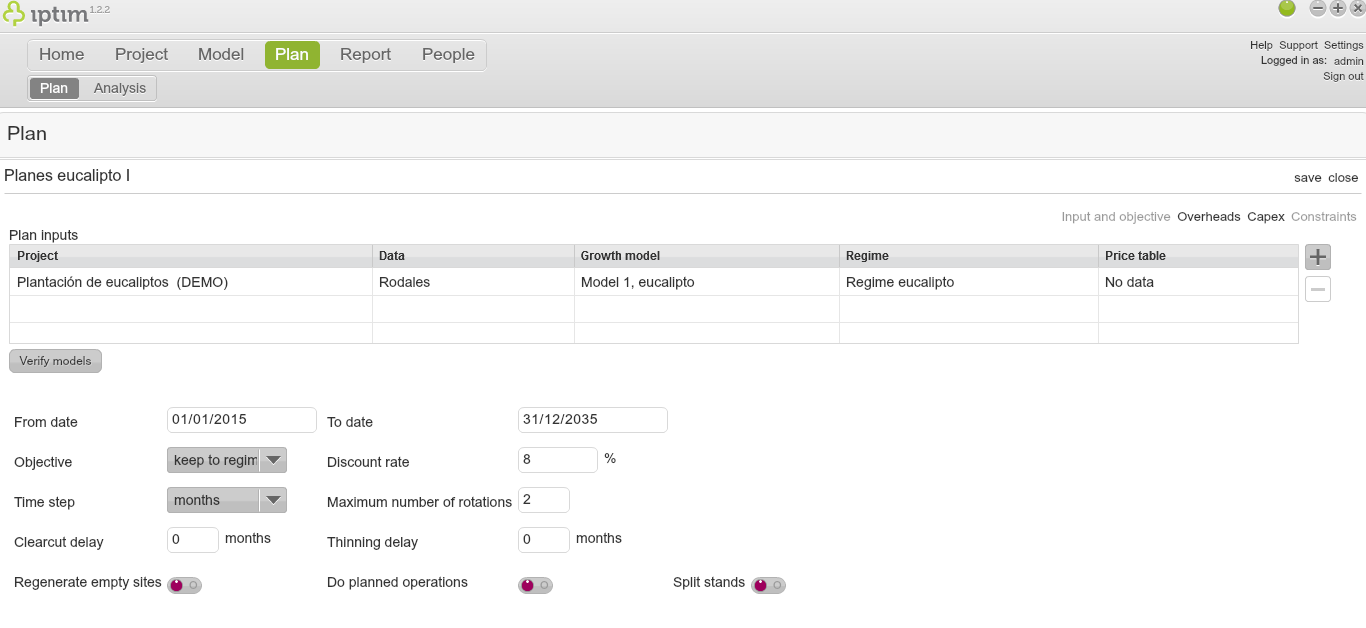
- Click on the button + to start the configuration. A new window appears showing the available data sets and similar projects.
- Turn on the switch buttons of the data sets (and similar projects) that you wish to use in your new plan.
- Click on the Growth Model drop-down menu and select a model to include in the plan.
- Click on the Price table drop-down menu and select a timber price table to include in the plan.
- Click on the Regime drop-down menu and select a regime to include in the plan.
- Click on add.
- Modify the From date and To date to set the planning horizon.
- Click on the Objective drop-down menu and select an objective. A plan with the keep to regime objective will maintain the previously specified regime and will not draw on optimisation. A plan with the maximise NPV (Net Present Value) objective will optimise the planning and, in doing so, it may override the previously defined regime.
- Modify the Discount rate.
- Modify the Time step (optional).
- Modify the Maximum number of rotations. This value indicates the maximum number of rotations which will be modelled by the system.
- Modify the Clearcut delay (optional). This value indicates the number of periods which Iptim will consider for clearcut operations. For example, if the regime specifies that a clear cut will but conducted in month 120, and you allow a delay of 3 months, the system will simulate scenarios for months 120, 121, and 122 to optimise the model.
- Modify the Thinning delay (optional). Similar logic as in Clearcut delay (above).
- Turn on the switch button Regenerate empty sites (optional). Turn on this option off if you want Iptim to regenerate non-planted terrains.
- Turn on the switch button Do planned operations (optional). Turn on this option if you want Iptim to conduct the operations specified in the regime.
- Turn on the switch button Split stands (optional). Turn on this option if you want Iptim to use linear programming to separate stands in finding the optimal solution.
- Click on save.
- Click on close. A window will appear asking if you want to save the plan before closing.
- Click on Yes.
- Click on the window Plan in the module Plan.
- Edit a plan (see above).
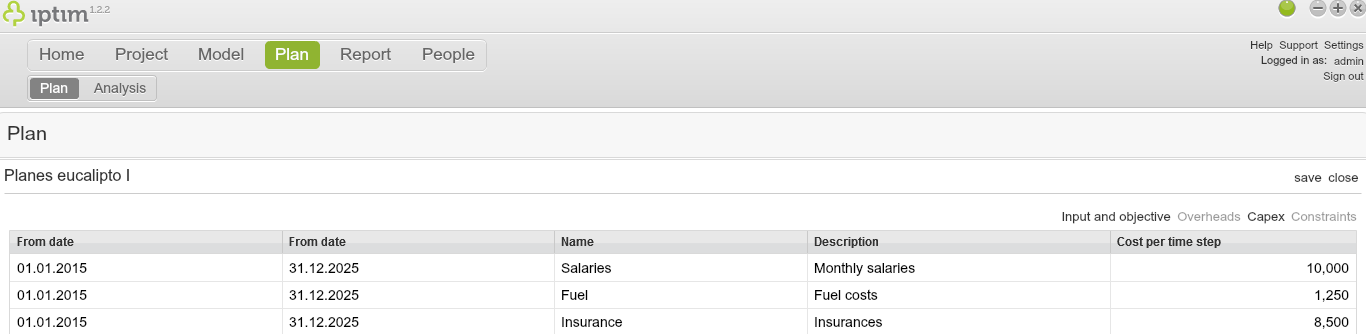
- Click on Overheads in the upper right side of your screen.
- Click on From date and enter an initial date for allocating the overhead costs.
- Click on To date and enter a final date for allocating the overhead costs.
- Click on Name and enter a name for the overhead costs.
- Click on Description and enter a description for the overhead costs.
- Click on Cost per time step and enter the value of the overhead costs.
- Click on save.
- Click on Input and objective to go to the plan setup window to configure the plan if needed (see above).
- click on the window Plan in the module Plan.
- Edit a plan (see above).
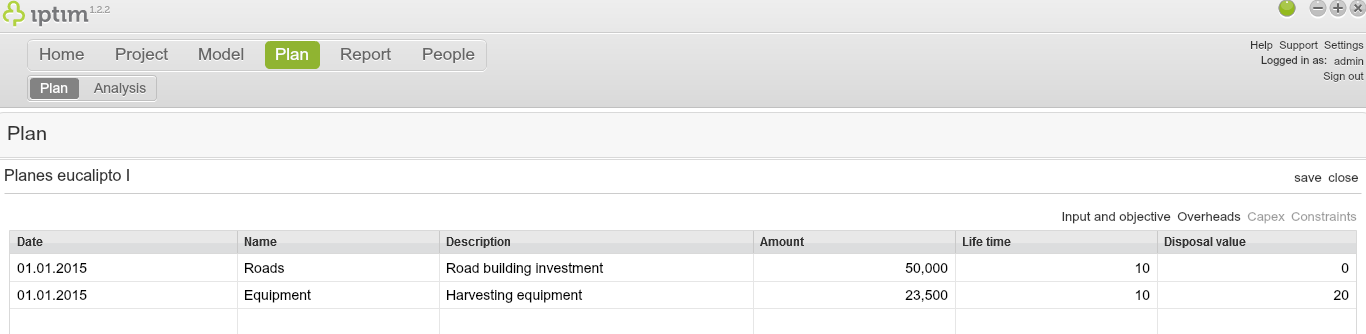
- click on Capex in the upper right side of your screen.
- Click on Date and enter a date for recording the capital expenditure (CAPEX).
- Click on Name and enter a name for the capex.
- Click on Description and enter a description for the capex.
- Click on Amount and enter the value of capex.
- Click on Life time and click on the expected life time of the capex in years.
- Click on Disposal value and enter a disposal value for the capex.
- Click on save.
- Click on Input and objective to go to the plan setup window to configure the plan if needed (see above).
- Click on the window Plan in the module Plan.
- Edit a plan (see above).
- Make sure that the Objective is set to maximize NPV.
- Click on Constraints in the upper right side of your screen.
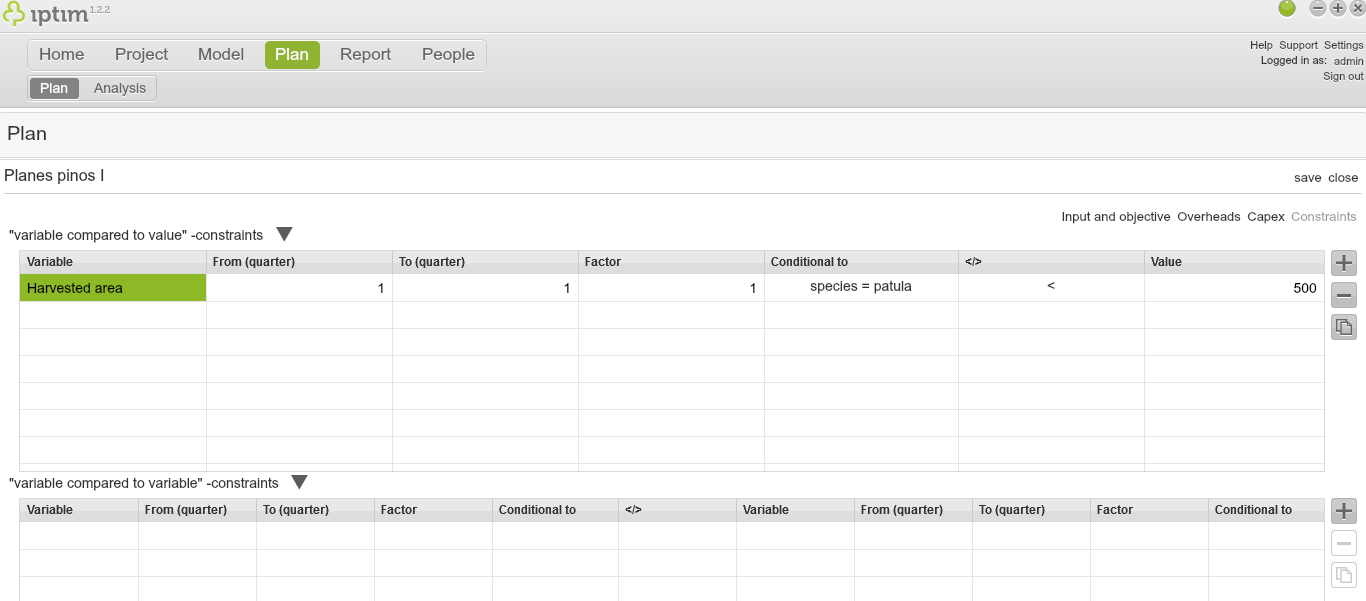
- Click on the button + on the section "variable compared to value"-constraints.
- Double click on the cell under the column Variable and choose a variable from the drop-down menu.
- Double click on the cell under the column From and enter an initial period to apply the constraint.
- Double click on the cell under the column To and enter a final period to apply the constraint.
- Double click on the cell under the column Factor and enter a numeric multiplier for the variable. For example, if you want to constraint the value in 90%, enter 0.9 (this feature is more useful in the second type of constraint).
- Double click on the cell under the column Conditional to to condition the restriction to certain variables (e.g. soil, species, assortment). Select the variable, the specific corresponding option, press the button +, and click on Save.
- double click on the cell under the column </> to choose between < or >.
- Double click on the cell under the column Value and enter a value for the constraint.
- Click on Save on the upper right side of your screen.
- Click on the window Plan in the module Plan.
- Edit a plan (see above).
- Make sure that the Objective is set to maximize NPV.
- Click on Constraints in the upper right side of your screen.
- Click on the button + on the section "variable compared to variable"-constraints.
- Double click on the cell under the column Variable at the left-most side of your screen and choose a variable from the drop-down menu.
- Double click on the cell under the column From and enter a initial period to apply the constraint.
- Double click on the cell under the column To and enter a final period to apply the constraint.
- Double click on the cell under the column Factor and enter a numeric multiplier for the variable. For example, if you want to constraint the value in 90%, enter 0.9 (this feature is more useful in the second type of constraint).
- Double click on the cell under the column Conditional to to condition the restriction to certain variables (e.g. soil, species, assortment). Select the variable, the specific corresponding option, press the button +, and click on Save.
- Double click on the cell under the column Variable around the centre of your screen and choose a variable from the drop-down menu.
- Double click on the cell under the column From and enter an initial period to apply the constraint.
- Double click on the cell under the column To and enter a final period to apply the constraint.
- Double click on the cell under the column Factor and enter a numeric multiplier for the variable. For example, if you want to constraint the value in 90%, enter 0.9 (this feature is more useful in the second type of constraint).
- Double click on the cell under the column Conditional to to condition the restriction to certain variables (e.g. soil, species, assortment). Select the variable, the specific corresponding option, press the button +, and click on Save.
- Click on save.
For example, if you wish to create a constraint to ensure that the harvested volume of patula in period 2 will be at least 10% higher than in quarter 1, fill in the restriction as in the following image.
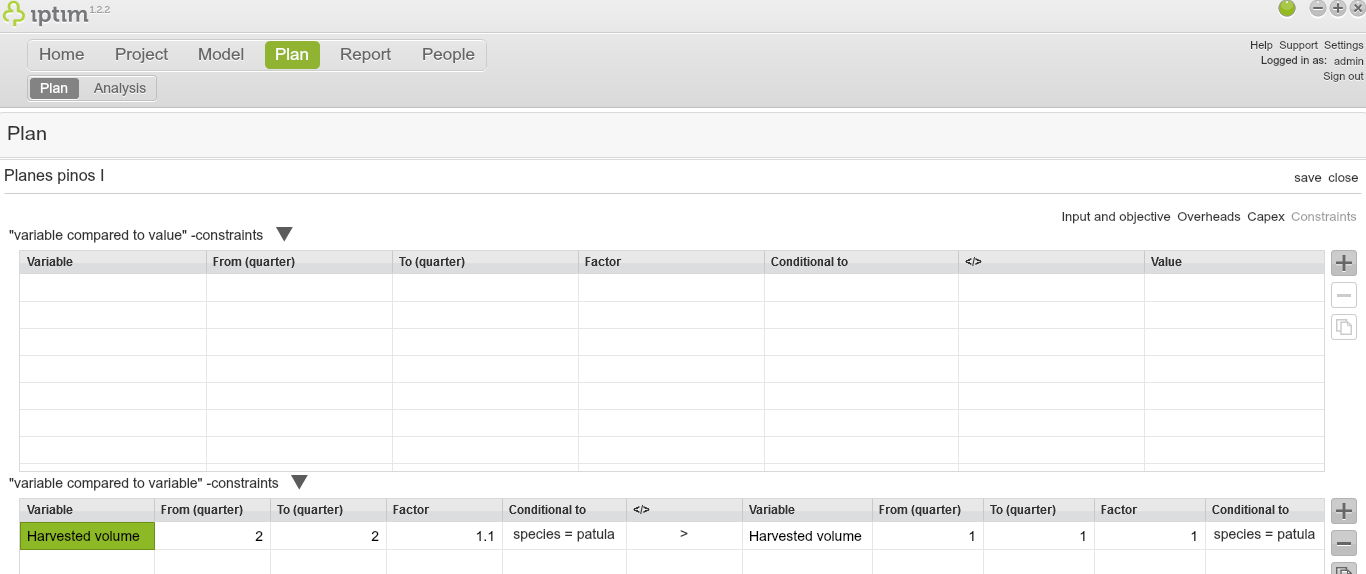
Add a constraint (variable compared to variable).
__
Running plans
To be able to analyse a plan, it is necessary to run it after its configuration:
- Click on the window Plan in the module Plan.
- Click on a plan previously configured (see above).
- Click on run on the upper right side of your screen. A window will appear indicating the execution of the plan.
- Click on OK. If the plan faces errors, it will not be executed and information on these errors will appear under Warnings and Errors on the right side on the right-hand section. Once the plan is ran successfully, the circle beside the plan will turn to green.

Button to run the plan.
__
Plan states (green, yellow and red)
Each plan has a circle beside it which can be either red, yellow or green:
- A green circle indicates that the plan has been ran successfully. You can verify this in the information on Plan state on the section on the right-hand side of your screen.
- A red circle indicates that the plan is not ready and it needs to be run successfully before being able to analyse it.
- A yellow circle indicates that the plan is in the process of running.
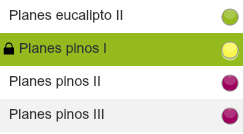
A plan list indicating one plan which is ready to be analysed (green), another in the process of running (yellow, and two not ready plans (red).
__
Activating plans
A plan can be activated once it is successfully executed. By activating a plan, you will be able to observe the operations on each stand (e.g. planting, thinnings, clear cuts) in the window Data. This feature allows you to modify dates, costs and other information for each operation. To activate a plan:
Click on the window Plan in the module Plan.- Click on a plan in the Plans section on the left side of your screen (the plan must have been previously running).
- Click in activate. A window appears asking for confirmation on the activation of the plan.
- Click on Yes. A window appears confirming the success of the activation.
- Click on OK.
More information on operational regimes in Regime.
More information on the window Data in Data.
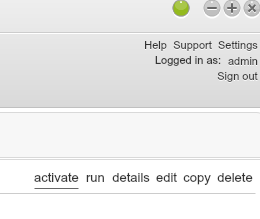
Button to activate a plan.
Comments
0 comments
Please sign in to leave a comment.